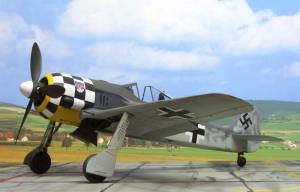
Converting Hasegawa's 1/32nd Fw 190 A-5 into an Fw 190 A-4
|
 |
Background
When I got the Hasegawa Fw 190A-8, I was
wondering how much work it would take to 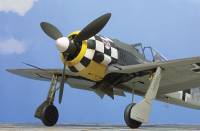  backdate
it to an A-3. Well, it looked like a lot of work! Now Hasegawa has come
out with the Fw 190A-5 and I thought this might do it. When I got the
kit, the first thing I noticed was the correct cowling with the long gun
troughs. This should make the conversion a lot easier. I got out all my
books on the Fw 190A's and some drawings for the A3 and got to work. Here
is what I did to convert the Fw190A-5 to an earlier A-3 version of the
aircraft. The following are changes made to update the A -4 to an A-5,
according to John
Beaman. backdate
it to an A-3. Well, it looked like a lot of work! Now Hasegawa has come
out with the Fw 190A-5 and I thought this might do it. When I got the
kit, the first thing I noticed was the correct cowling with the long gun
troughs. This should make the conversion a lot easier. I got out all my
books on the Fw 190A's and some drawings for the A3 and got to work. Here
is what I did to convert the Fw190A-5 to an earlier A-3 version of the
aircraft. The following are changes made to update the A -4 to an A-5,
according to John
Beaman.
-
In an effort to overcome both weight distribution problems and the
internal engine heat problem in the Fw190A-3/4, the entire engine was
moved forward 5+ inches. This resulted in a longer cowling for the MG
cover, fuselage side panel, and a special insert near the wing roots.
-
The side cowling cooling slots changed from an open slot to ones
that were rectangular and could be opened and closed. Some A-4's were
retrofitted with this feature.
-
The pilot armor changes again!
-
The fuselage opening cover on the left side changes from a trapezoid
shape to a larger, rectangular shape.
 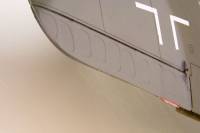 One
other thing I found was the differing pattern on the control surfaces.
You could leave what the kit has, but I tried making some new ones. One
other thing I found was the differing pattern on the control surfaces.
You could leave what the kit has, but I tried making some new ones.
For
the most part these are the major areas where I made changes to back
to an A-4. Now here are some specific things I did to create my conversion.
The Conversion
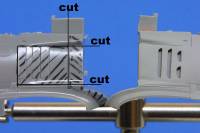 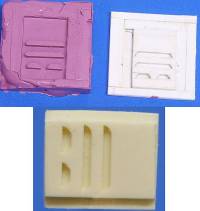 As
you can see from the pictures, I made some markings just where I made
the cut on the fuselage. The kit has a line where to make the cut to take
out the scale 5" on the kit. I cut down to the wing, and then cut
back to the last louver on the fuselage. The photo shows where to make
the cut on the wing root. I made a part with the new cooling vents and
cast a resin copy. I slid the new part into the fuselage hole that I cut
out and glued in place. I sanded it down and put on a coat of Mr. Surfacer
1000 to fill in the marks left from the sanding. As
you can see from the pictures, I made some markings just where I made
the cut on the fuselage. The kit has a line where to make the cut to take
out the scale 5" on the kit. I cut down to the wing, and then cut
back to the last louver on the fuselage. The photo shows where to make
the cut on the wing root. I made a part with the new cooling vents and
cast a resin copy. I slid the new part into the fuselage hole that I cut
out and glued in place. I sanded it down and put on a coat of Mr. Surfacer
1000 to fill in the marks left from the sanding.
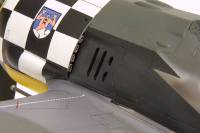 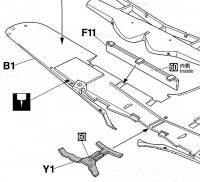 I
taped the fuselage together and was surprised when I put the nose on to
find that it fit right in place. I did make some tabs and put them on
the inside at the top of the cowling to help with lining it up with the
fuselage. I put the wing on and marked where I would cut part Y1 so it
will fit into the cowling. However, if you make your cuts correctly and
take your time dry fitting pieces, you won't need any putty. Then I glued
the engine into the cowling and drilled out the exhausts. I did not glue
it to the fuselage at this time, since I wanted to paint the cowling separately.
It is easier to mask off the squares and paint it that way. I
taped the fuselage together and was surprised when I put the nose on to
find that it fit right in place. I did make some tabs and put them on
the inside at the top of the cowling to help with lining it up with the
fuselage. I put the wing on and marked where I would cut part Y1 so it
will fit into the cowling. However, if you make your cuts correctly and
take your time dry fitting pieces, you won't need any putty. Then I glued
the engine into the cowling and drilled out the exhausts. I did not glue
it to the fuselage at this time, since I wanted to paint the cowling separately.
It is easier to mask off the squares and paint it that way.
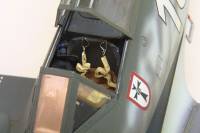 I
put the cockpit together and painted it. I used the kit decals for the
instruments. I scratch built the oxygen regulator and added it to the
right side of the seat. This was not included in the kit, but was easy
to add. I
put the cockpit together and painted it. I used the kit decals for the
instruments. I scratch built the oxygen regulator and added it to the
right side of the seat. This was not included in the kit, but was easy
to add.
Next, I used the drawings and pictures
I had available to scribe in the new radio hatch and used the kit directions
as to what other hatches to delete on the kit. I used super glue to fill
them in and then sanded them down.
 The
next step was the wing. The only thing I did here was a little extra work
on the landing gear bays. I added some wires and stuff. I took some pictures
of the Fw 190-D 13 Yellow 10 that is at the Boeing Museum of Flight in
Seattle. This was a big help with the detailing of the landing gear bays
and other areas that the 190 have in common. The
next step was the wing. The only thing I did here was a little extra work
on the landing gear bays. I added some wires and stuff. I took some pictures
of the Fw 190-D 13 Yellow 10 that is at the Boeing Museum of Flight in
Seattle. This was a big help with the detailing of the landing gear bays
and other areas that the 190 have in common.
I wanted to change the pattern of the
control surface on the kit. In looking at pictures and drawings of the
A-3/4, you can see they have a different fabric pattern than the A-5 and
later marks. I started out by making a copy in 1/32 scale of the pattern
of the control surface. I got some .005 clear plastic, cut 10 pieces to
the size of the rudder, and put them together with the pattern for the
rudder taped to the top piece. I then used the scroll saw to cut out the
stack of pieces. When I took the 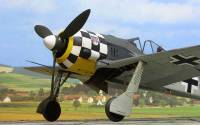 tape
off, I had 10 identical rudder pieces. I took one, lined it up with the
rudder, and glued it down. If you used clear plastic, you can see exactly
where the glue is going and where it is not glued down. This made it a
lot easier. I let it dry for a day, and then used some 1000-grit sandpaper
to sand it lightly and take off any high spots. I brushed on a couple
of coats of gray paint, let it dry, and sanded again. I repeated this
step until the cutouts were all filled in and it looked right to me. With
that all done, I glued the wing to the fuselage. Take your time and dry
fit your pieces and you should not need any putty. tape
off, I had 10 identical rudder pieces. I took one, lined it up with the
rudder, and glued it down. If you used clear plastic, you can see exactly
where the glue is going and where it is not glued down. This made it a
lot easier. I let it dry for a day, and then used some 1000-grit sandpaper
to sand it lightly and take off any high spots. I brushed on a couple
of coats of gray paint, let it dry, and sanded again. I repeated this
step until the cutouts were all filled in and it looked right to me. With
that all done, I glued the wing to the fuselage. Take your time and dry
fit your pieces and you should not need any putty.
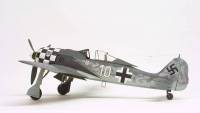
Now came the painting. The unit I wanted
to do was JG 1. They had some very colorful markings on their FW 190s.
The best reference books out there are the three volumes of the JG1 by
Eric Mombeek. You will find some very interesting versions to do, from
the Fw 190A-2 to the He 162 at the end of the war. Volume 2 had the pictures
of the markings that I wanted to do. In 1943, there were some interesting
markings with either black and white stripes, or checkers on the cowling.
There were also red and black and yellow and black checker combinations.
I decided to go with the black and white checker version.
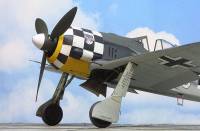
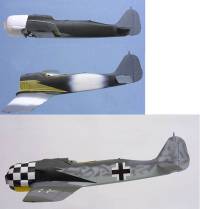 I
painted the nose white and then marked off the squares, taped them off
and painted black. I painted the under side of the cowling yellow. This
is much easier to do with the nose not glued onto the fuselage. I painted
black on the area where the crosses are on the fuselage and on the underside
of the wings. Then I masked off those crosses and painted white. I did
the top of the wings the same way starting with the white and masking
it out. This gave me some nice painted on national markings. I
painted the nose white and then marked off the squares, taped them off
and painted black. I painted the under side of the cowling yellow. This
is much easier to do with the nose not glued onto the fuselage. I painted
black on the area where the crosses are on the fuselage and on the underside
of the wings. Then I masked off those crosses and painted white. I did
the top of the wings the same way starting with the white and masking
it out. This gave me some nice painted on national markings.
Then I put on the camouflage. I used PolyScale
Acrylic paints. The fuselage is RLM 76 for the sides and the undersurface.
The wings are RLM 74 and 75. I camouflaged the sides of the aircraft with
some RLM 75. I put on some Future Floor Wax for the gloss coat. Now it
was ready for decaling.
I did not have a decal for the unit marking
of JG 1 or the Gruppe marking. Chris did the artwork and had five sets
of decals made up for me….just in case I needed them! I did have
to use two of the Gruppe markings on the nose since the decal was very
transparent and the black showed through. I used the kit decals for the
other markings. With the decals all in place, I added another coat of
Future Wax.
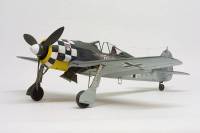 I
weathered the aircraft with an enamel wash of black, burnt umber, and
some red. When that was dry, I added a final coat of Poly Scale Flat mixed
with some of the Future Wax for a slightly glossy finish. I
weathered the aircraft with an enamel wash of black, burnt umber, and
some red. When that was dry, I added a final coat of Poly Scale Flat mixed
with some of the Future Wax for a slightly glossy finish.
I put the landing gear on and put in the
brake lines and other details. The kit has the later wheel hub. I wanted
the six hole hub from the A-3 version. I had some wheels from the old
kit of the FW 190, but would have been more work to fill in the tread.
It looked like I could just make some new hubs, so I copied the hole pattern
onto some sheet styrene and made the new ones and they fit right into
the kit wheels.
  I
made some seatbelts out of paper and then made some wire buckles. I also
made a seat cushion for the seat. I made an oxygen hose and put that in
as well. Next, I put the canopy on and added the antenna. This was a little
tricky, but I finally got it in place. I
made some seatbelts out of paper and then made some wire buckles. I also
made a seat cushion for the seat. I made an oxygen hose and put that in
as well. Next, I put the canopy on and added the antenna. This was a little
tricky, but I finally got it in place.
The entire conversion was easier than
I thought it would be. Hasegawa's new kits of the Fw190 are worth getting.
I hope that Hasegawa will come out with an A-3 version sometime, but until
then you can make your own with a little time and effort.
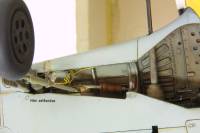
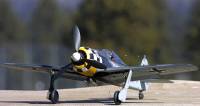
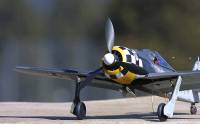
  When
I was taking pictures of the FW 190D-13 at Seattle, I remembered all that
has been said about the rivets on the D-9. Therefore, here is a picture
of the side of the fuselage of the D-9 and you can see it is all flush
rivets. Therefore, you do not need to drill out all the rivets on the
kit. When
I was taking pictures of the FW 190D-13 at Seattle, I remembered all that
has been said about the rivets on the D-9. Therefore, here is a picture
of the side of the fuselage of the D-9 and you can see it is all flush
rivets. Therefore, you do not need to drill out all the rivets on the
kit.
All the pictures of the model were taken
with a Canon D 30 digital camera.
Thanks to Rick Uliano for the review sample from Just
Plane Hobbies.
References
Defenders
of the Reich JG 1
Volume 1 1939-1942
Volume 2 1943
  Aero
Detail No. 6 FW 190 A/F. Aero
Detail No. 6 FW 190 A/F.
Aircraft Monograph No. 5 FW 190 A/F/G/S Part II.
Squadron Walk Around FW 190 A/F.
|
|


 backdate
it to an A-3. Well, it looked like a lot of work! Now Hasegawa has come
out with the Fw 190A-5 and I thought this might do it. When I got the
kit, the first thing I noticed was the correct cowling with the long gun
troughs. This should make the conversion a lot easier. I got out all my
books on the Fw 190A's and some drawings for the A3 and got to work. Here
is what I did to convert the Fw190A-5 to an earlier A-3 version of the
aircraft. The following are changes made to update the A -4 to an A-5,
according to John
Beaman.


