DML Dragon 1/35 Pz.Kpfw. I Ausf. B DAK Version
Kit no. 6207
MSRP: $29.50
|
 |
History
The Panzer I was the first German tank to go into production, with
nearly 600 having been ordered by July 1934. Three separate companies
were engaged to build the tank (deliberately to spread experience of tank
manufacture as widely as possible) and over 800 had been produced by June
1936, when production ceased.
To avoid being seen to break the Treaty of Versailles, which prohibited
the Germans from building tanks, the design was disguised as an 'agricultural
tractor'. The Panzer I Ausf. A was found in varying numbers in all panzer
units and served extensively during the early campaigns of WWII. However,
its limitations in armour and armament were soon evident, and it had been
withdrawn from frontline service by 1941. During that year it was used
mainly as a reconnaissance vehicle.
In August 1936, production of the Ausf. B version began with 675 eventually
being produced. This version had a longer chassis and redesigned suspension
(although it retained the external beam) enabling it to accommodate a
larger and more powerful water-cooled engine. It too stayed in service
until 1941 in rapidly diminishing numbers.
What's in the box?
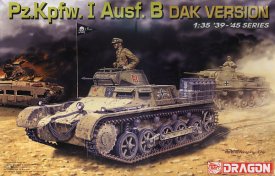
The kit comes in a tray and lid type box. The box art is by an artist
named Restayn and not by DML's usual artist Ron Volstad. It shows a Pz.Kpfw.
I Ausf. B leading a Pz.Kpfw. III past a burning British Matilda tank in
the background. It is marked as a vehicle of the 15th Panzer Division.
The turret has the letter 'R' on it, which is the marking for a regimental
headquarters tank. This letter is usually followed by a two digit number,
in either Roman numerals or Arabic numbers. I can't confirm only the letter
'R' being used 'alone' in any of my home library books. Anybody know if
this is correct or not?
The number 01 behind the R stands for the regimental commander, 02
would be the adjutant, 03 either the signals or ordinance officer, 04
(and upwards) would be other regimental headquarters vehicles. These markings
are all on the decal sheet to choose from. However, the pennant shown
on the aerial of the tank on the box art is not included.
The box's side panels picture special features and bonus parts that
are in the kit. I found the box to be a little blousy upon opening it.
There are nine trees of medium gray colored parts, the single piece
that is the chassis bottom and a tree of clear parts that are in nine
cello bags. A 10th cello bag holds the decal sheet, two brass PE frets
and a small tree of clear headlight lenses fastened to a card.
The instructions complete the kit. These instructions is a large sheet
that accordian folds out into eight pages.
Page one begins with a black and white copy of the box art. This is
followed by the parts tree drawings. Some parts in these drawings are
shaded over in blue color, meaning they are excess/not needed to complete
the model.
There is no vehicle history provided. This is a constant omission in
most of DML's armor kits and one of my pet peeves with them. They should
include a history. Only a few of their kits, produced at the Shanghai
plant, have had this. Not the ones from the Hong Kong plant.
Page 2 begins with some general warnings, followed by international
assembly symbol explanations and a paint color chart. The bottom of the
page gives us the first two assembly steps.
Pages 3 through the top of page 7 give us the balance of a total of
13 assembly steps for the vehicle. The bottom of page 7 has step number
14, which is the instructions for assembling the four Afrika Korps figures.
Page 8 gives two color and marking scheme drawings. Both are for Regimental
Headquarters vehicles. One is in overall sandy brown for the 5th Panzer
Div. And the other scheme is overall panzer gray for the 21st Panzer Div.
Letter A parts tree is co-joined to a single part that is labeled as
letter L. The A part holds: lift hooks, a fire extinguisher, rear upper
engine deck parts, some tools, the muffler, rear towing points, nose plate,
springs etc. The single letter L piece is the central upper deck piece.
(36 parts)
Letters B, D, and E are all joined into one tree. This tree holds:
some more tools, fender front parts, the jack block, the jack, the rear
hull panel and various other small parts. (67 parts) The parts tree drawings
have 11 of the parts on this tree shaded in blue as being excess/not needed.
There are two large, and identical, letter C parts trees. These trees
hold: individual track links, drive sprockets, idler wheels, road wheels,
bogies etc. (128 parts per tree)
There are no G or H parts trees.
Letter I is the single chassis bottom tub piece.
MA and MB are the two brass PE frets. They hold: a jerry can rack,
parts that go into the center of the jerry cans, a tail lights parts (the
kit gives us four different variants of tail lights to choose from), a
perforated muffler shield, the engine air intake screen and some chains
that go on the smoke candle tubes at the rear of the tank.
Letter N tree is jerry can parts. (12 parts)
Letter P tree is clear headlight lenses (3 parts)
Lettering now jumps to letter W parts tree. This is clear vision block
pieces - these may be posed open or closed. (22 parts) A tree marked only
as 6063 is the parts for the fourAfrika Korps figures. This is the kit
number for when these figures were sold alone earlier. This kit is now
out of production by itself. All these figures are dressed in shorts.
One figure wears a field blouse and the others have just shirts. Two figures
are wearing field caps and two are wearing pith helmets. There is a dog,
a lizard, sand goggles, various water containers, a small folding field
stove, a canteen, mess kits and a spoon included in this set. Two trees
make up this set of figures. They are divided up into separate heads,
arms, torsos and legs. (57 parts)
The decal sheet completes the kit's contents.
Conclusion
The only fault I found with this kit was the fact that the turret hatch
can be posed open, revealing the inside. There are no rear parts for the
two machine-guns (the breeches), which would be very visible if you pose
the hatch open. You dont get a commander figure, like the guy shown in
that hatch on the box art. I intend to use some breeches out of my spares
box to remedy this. Otherwise, I highly recommend this kit. I have always
been kind of fan of Afrika Korps armor and will enjoy building this kit
for sure. I purchased my kit at my local hobby shop.
|
|


