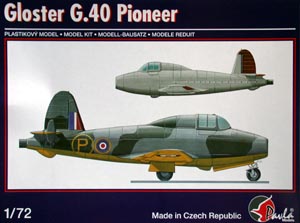
Pavla 1/72 Gloster
G.40
Pioneer (E.28/39)
|
 |
History
The Gloster E.28/39 was the first jet engined aircraft to fly in the
United Kingdom. In September 1939, the Air Ministry issued the specification
E.28/39 to Gloster Aircraft Company for an aircraft to test one of Frank
Whittle's turbojet designs in flight. The Air Ministry signed a contract
for two prototypes on February 3, 1940.
Gloster's chief designer George Carter laid out a small-wing aircraft
of conventional configuration. The aircraft was a low wing monoplane
with a wide fuselage section to accommodate the airflow passages from
the nose. The aircraft had fabric covered control surfaces and a tricycle
undercarriage. When first flown the aircraft was powered by the Whittle
W1 engine.
The prototype W4041/G (the G suffix marked it a classified project
that required guarding) rolled out at Gloster Aircraft on April 5, 1941.
The first flight occurred on May 15, 1941. P.E.G. Sayer, the chief test
pilot of Gloster and Britain's first jet pilot, piloted the aircraft.
This prototype was extensively tested over the next few months, achieving
maximum speed of 370mph.
The second prototype, W4046/G, joined the test program in March 1943
and was powered by a Rover W2B engine. This plane was destroyed in a
crash just a few months later, on July 30. Aileron failure was determined
to be the cause. The first prototype continued the flight test program
until retired in 1944. It now resides at the British Science Museum in
London.
The Kit
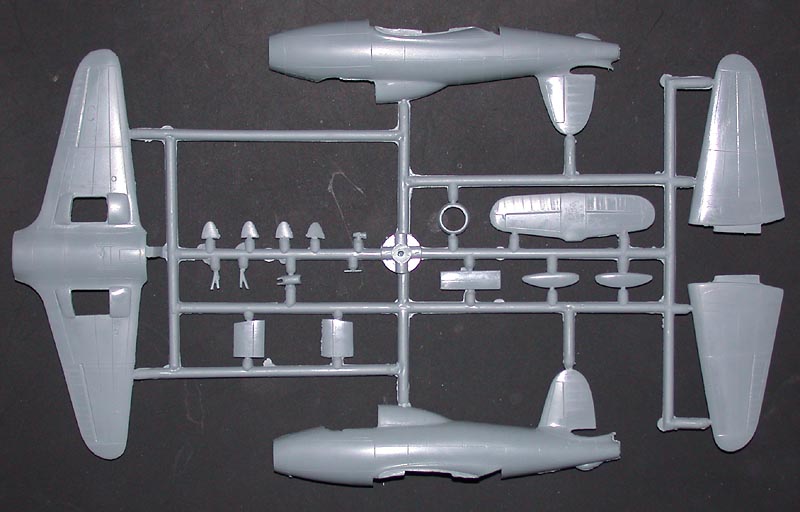
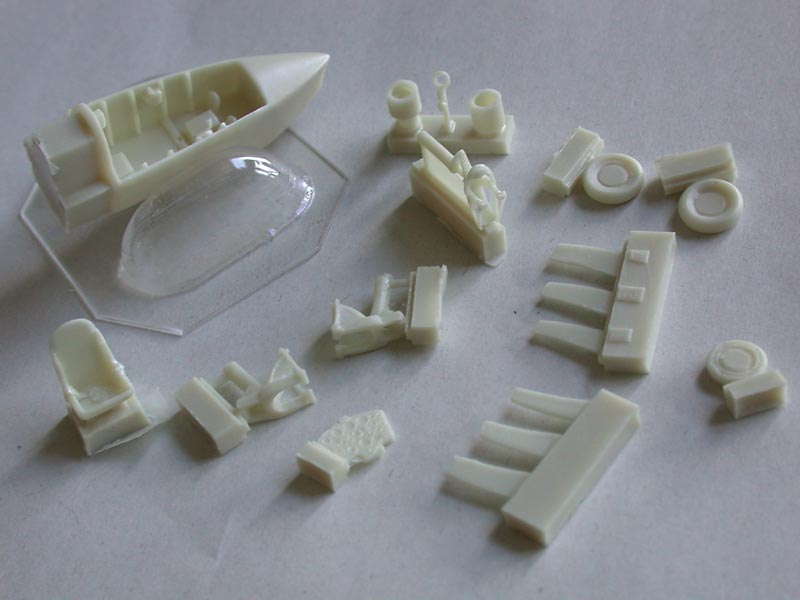
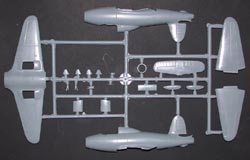 Pavla's latest kit tackles this diminutive aircraft with aplomb. It
comes with a combination of injection plastic parts, cast resin details,
and vacuformed canopies. The decal sheet offers several different iterations
of the original prototype, W4041/G. The plastic parts feature recessed
panel lines and have minimal flash. The resin parts are crisply cast,
and the decals are in register with dense color. Pavla's latest kit tackles this diminutive aircraft with aplomb. It
comes with a combination of injection plastic parts, cast resin details,
and vacuformed canopies. The decal sheet offers several different iterations
of the original prototype, W4041/G. The plastic parts feature recessed
panel lines and have minimal flash. The resin parts are crisply cast,
and the decals are in register with dense color.
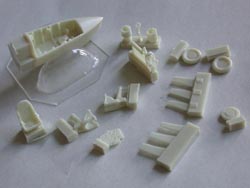
Construction begins with the cockpit, and this means working with lots
of resin. The cockpit tub incorporates the nose gear well and the intake
splitter as one large casting, which will make assembly much easier.
The instrument panel is separate, as is the seat, and some careful painting
will give a realistic looking cockpit. For the splitter, there are resin
vanes that need to be added, and depending on the time frame of the finished
aircraft you want to depict, you have an option of having these on either
the right side or on both sides. Consult your references to see just
when these were added or removed.
 Once the cockpit assembly is done, the rest of the construction is
very simple. The cockpit tub is sandwiched between the two fuselage halves,
with a separate one-piece intake ring covering the front seam. The one
piece lower wing includes a piece of the lower fuselage, which will help
keep things aligned correctly. The upper wing halves have separate bulges
to apply above the wheel wells, and the one piece stabilizer slides into
a notch at the rear fuselage. Once the cockpit assembly is done, the rest of the construction is
very simple. The cockpit tub is sandwiched between the two fuselage halves,
with a separate one-piece intake ring covering the front seam. The one
piece lower wing includes a piece of the lower fuselage, which will help
keep things aligned correctly. The upper wing halves have separate bulges
to apply above the wheel wells, and the one piece stabilizer slides into
a notch at the rear fuselage.
The landing gear is resin, both in struts and wheels. The squat appearance
of the Gloster G.40 is accurately captured with this gear and it should
be plenty robust enough to support the finished model. Two styles of
canopies are provided, as are two types of exhaust pipes. Toss on the
gear doors, add the wing pitot, and this Pioneer is ready for paint.
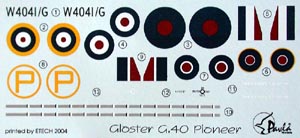 The painting options for this kit should appeal to just about anyone.
The first option is the prototype as seen before rollout. This plane
is finished in overall aluminum dope, with the fabric control surfaces
painted a brown red. The only markings on this version is a registration
stripe down the fuselage side. For those who prefer a camouflaged aircraft,
the remaining two options are finished in standard RAF colors. The first
one is finished in dark earth and dark green, with a yellow underside.
This plane has standard RAF roundels in all six positions, with the serial
in black on the rear fuselage. The second one replaces the dark earth
with ocean gray, and has smaller roundels on the fuselage. That makes
room for the large Circle P prototype marking. The painting options for this kit should appeal to just about anyone.
The first option is the prototype as seen before rollout. This plane
is finished in overall aluminum dope, with the fabric control surfaces
painted a brown red. The only markings on this version is a registration
stripe down the fuselage side. For those who prefer a camouflaged aircraft,
the remaining two options are finished in standard RAF colors. The first
one is finished in dark earth and dark green, with a yellow underside.
This plane has standard RAF roundels in all six positions, with the serial
in black on the rear fuselage. The second one replaces the dark earth
with ocean gray, and has smaller roundels on the fuselage. That makes
room for the large Circle P prototype marking.
Conclusion
This is a nice little kit of the Gloster Pioneer and its easy assembly
will make it a great one-week project. My thanks to Squadron for the
review sample.
|
|