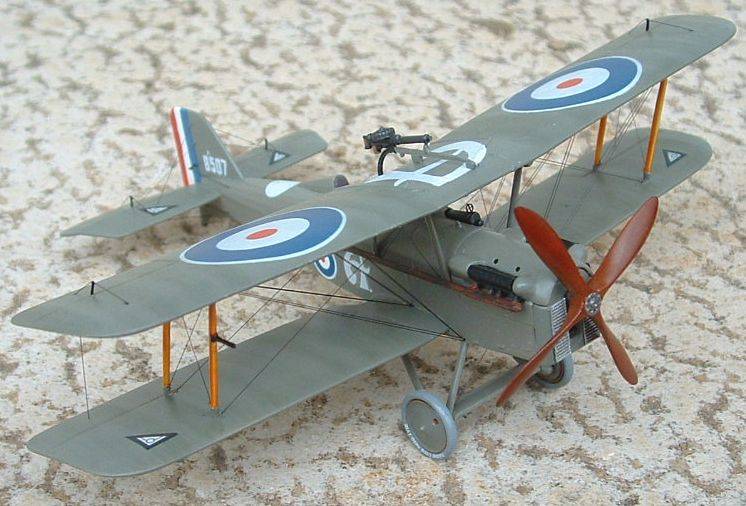
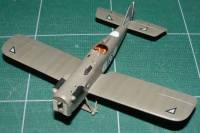
Building the Roden
SE5a Hispano Suiza in 1/72
|
 |
History
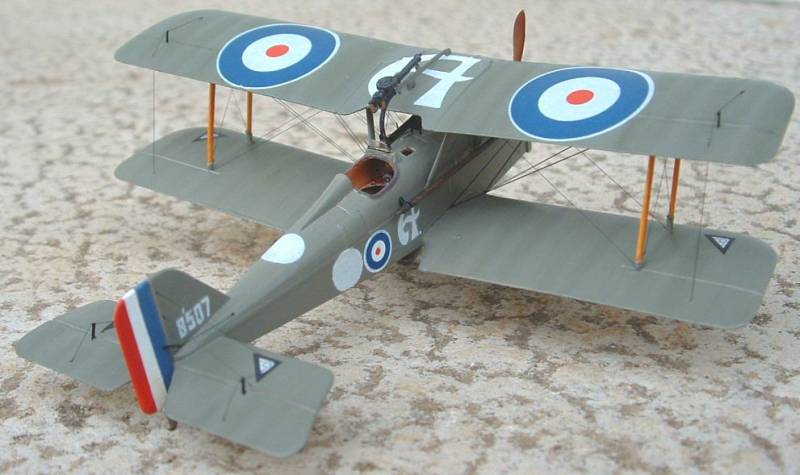
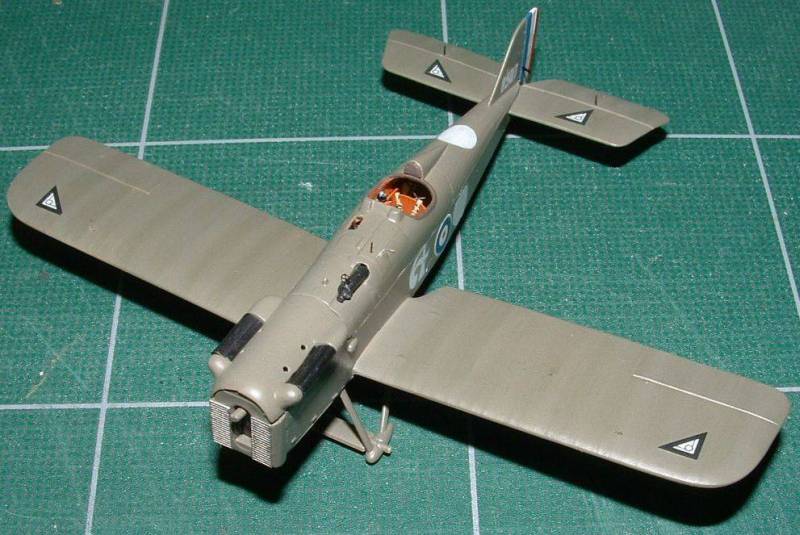
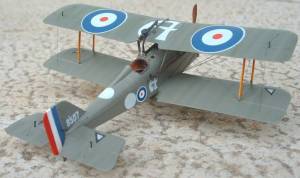
The RAF SE5a depicted here was built using the 200-hp Hispano-Suiza
engine. This was one of the best aeroplanes of its time even if it has
some problem of reliability with its engine. One of the reason why the
engine was replaced by the Wolseley Viper one, the other reason was the
availability.
I will not come back to the content of the kit as an in-box review
was presented in a previous issue of Internet Modeler in September 2003.
Building the Kit
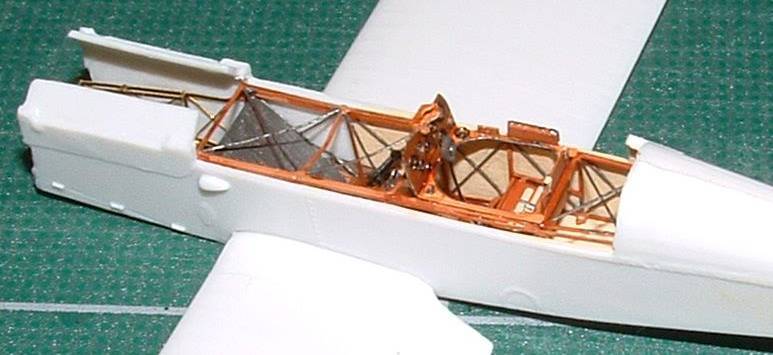
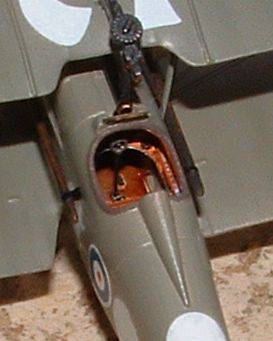
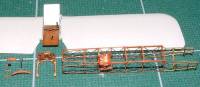 As
usual, I started with the fuselage interior and as I like to have my life
complicated, I used the PART photoetched set (reviewed in October 2003
issue of Internet Modeler). I started by the thin and delicate PE fuselage
structure, first to separate it from its support and then to bend it.
After that I removed all of the plastic details in the cockpit and started
the "tests and trim to fit" operation. I found that the internal
structure is a little bit oversized for the kit. I say "for the kit"
because it is possible that it is exactly in the right dimension but you
have to reduce the thickness of the fuselage walls as thin as the real
plane. An anxious time during this operation for not to pass through the
fuselage. As
usual, I started with the fuselage interior and as I like to have my life
complicated, I used the PART photoetched set (reviewed in October 2003
issue of Internet Modeler). I started by the thin and delicate PE fuselage
structure, first to separate it from its support and then to bend it.
After that I removed all of the plastic details in the cockpit and started
the "tests and trim to fit" operation. I found that the internal
structure is a little bit oversized for the kit. I say "for the kit"
because it is possible that it is exactly in the right dimension but you
have to reduce the thickness of the fuselage walls as thin as the real
plane. An anxious time during this operation for not to pass through the
fuselage.
 After
that, I painted the structure to simulate wood (a coat of Humbrol 110
and one of Citadel chestnut ink). The wires are painted Citadel Boltgun
metal. The fuselage interior is also painted in order to match the parts
made of metal or linen. I didn't use the PE part for the bottom of the
internal structure. After some other problems, I removed also the front
part of the structure. It is useful only if you want to open the cover
engine. Then, all of the elements are fitted place and the fuselage closed.
The hardest part of this kit is ended !!! After
that, I painted the structure to simulate wood (a coat of Humbrol 110
and one of Citadel chestnut ink). The wires are painted Citadel Boltgun
metal. The fuselage interior is also painted in order to match the parts
made of metal or linen. I didn't use the PE part for the bottom of the
internal structure. After some other problems, I removed also the front
part of the structure. It is useful only if you want to open the cover
engine. Then, all of the elements are fitted place and the fuselage closed.
The hardest part of this kit is ended !!!
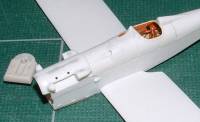 After
that, I added the engine cover, and the top of the cockpit with no major
problem, I only have to reshape this last part with hot water to adjust
it well. I also drill all of the required holes for the rigging (0.3mm
diameter). After
that, I added the engine cover, and the top of the cockpit with no major
problem, I only have to reshape this last part with hot water to adjust
it well. I also drill all of the required holes for the rigging (0.3mm
diameter).
You can see the engine cooler with sink marks. For me, it is not a problem
as I have the PE grids to cover it. If you don't use it, you will have
to sand all of the details, fill the holes and scratch the details again.
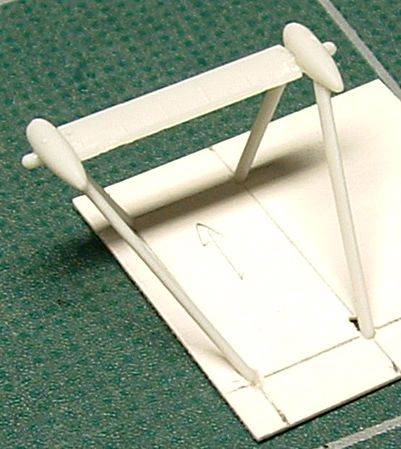
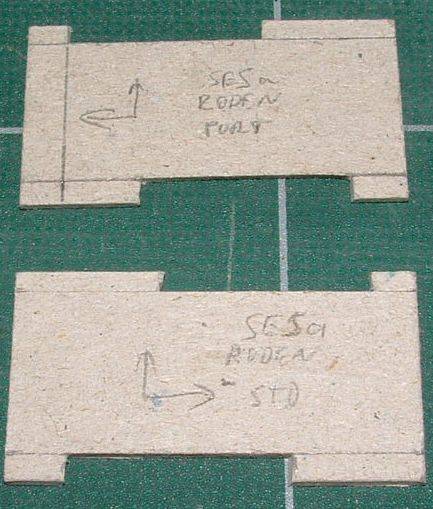
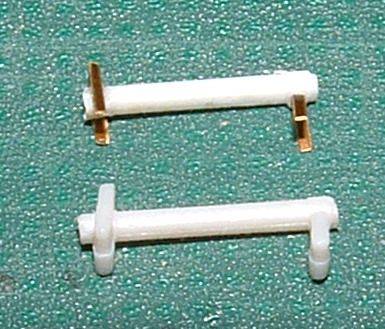
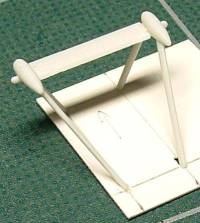 Then,
I build the landing gear with the help of a little jig made from the cardboard
provided with the Part PE. Very helpful to obtain a good alignment. Then,
I build the landing gear with the help of a little jig made from the cardboard
provided with the Part PE. Very helpful to obtain a good alignment. 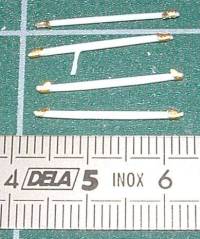 I
also prepare the struts, with the use of the PE rigging fixation. Not
a very easy task as these parts are very small. I spent more time to look
for them on the floor than to bend and glue them. I want to try to attach
the rigging to these fixations. I
also prepare the struts, with the use of the PE rigging fixation. Not
a very easy task as these parts are very small. I spent more time to look
for them on the floor than to bend and glue them. I want to try to attach
the rigging to these fixations.
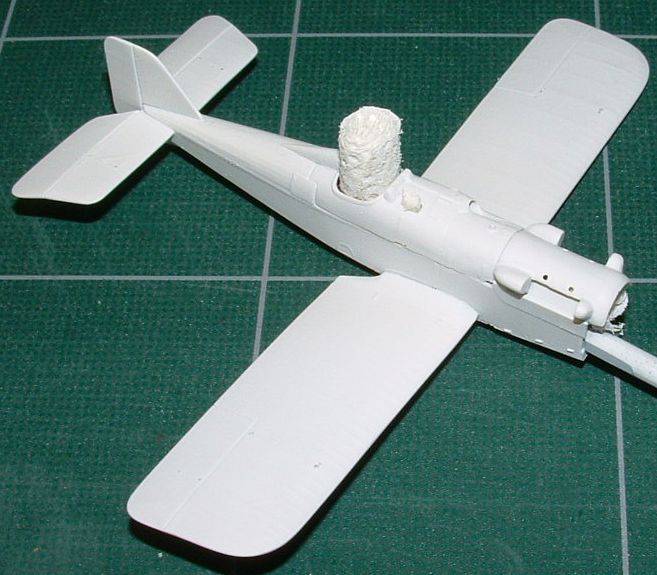
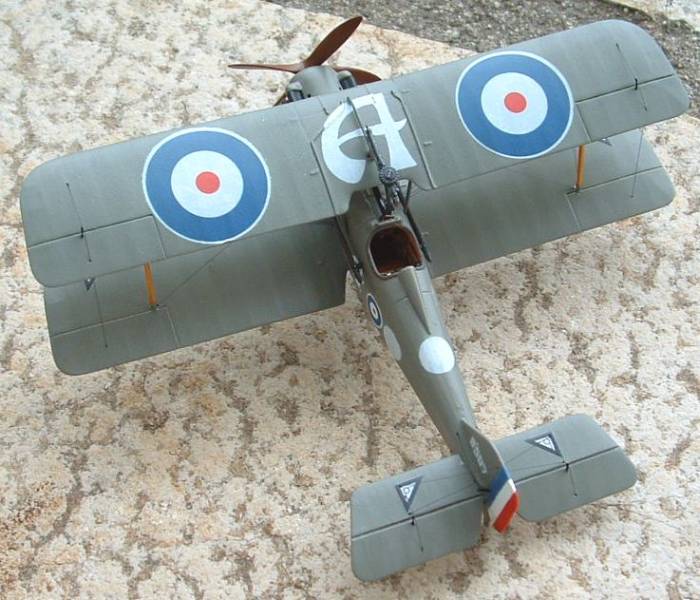
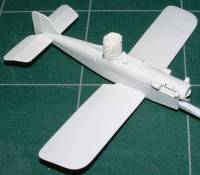
Back to the main part of the construction, I spray a coat of Citadel
"Skull white" (in spray can) over the entire kit, it is better
for the next painting stages and help to see the remaining defects due
to the assembly process.
 Then,
I airbrush a coat of MisterKit GB CDL under the wings and after a long
operation of masking in order to reproduce the paint under the wings,
a coat of MisterKit PC10 everywhere else except on the rudder. Then,
I airbrush a coat of MisterKit GB CDL under the wings and after a long
operation of masking in order to reproduce the paint under the wings,
a coat of MisterKit PC10 everywhere else except on the rudder.
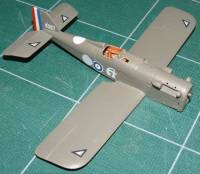
After that, I go to the decals operation. First, an underwing roundel
… and a disaster. The decal splits in hundreds of parts. As I already
heard of this problem on the WW1 discussion list, with the help of Matt
Bittner, we ask to Roden for a new decal sheet. And 2 weeks after, I received
a new one, far better than the first one. When the decals in place, I
cover the whole plane with a coat of Prince August (Vallejo) satin varnish.
Note, the rudder is painted, as it is easier than use the decals provided.
The only problem is to find the good colour to match the roundels.
 Then,
I add the engine cooler, the landing gear and the control horns. I also
add weathering, mainly on the wings, with pastel chalk, a yellow for the
underside of the wings and a dark green for the upper side. I add it with
the help of a Q-tip. Then,
I add the engine cooler, the landing gear and the control horns. I also
add weathering, mainly on the wings, with pastel chalk, a yellow for the
underside of the wings and a dark green for the upper side. I add it with
the help of a Q-tip.
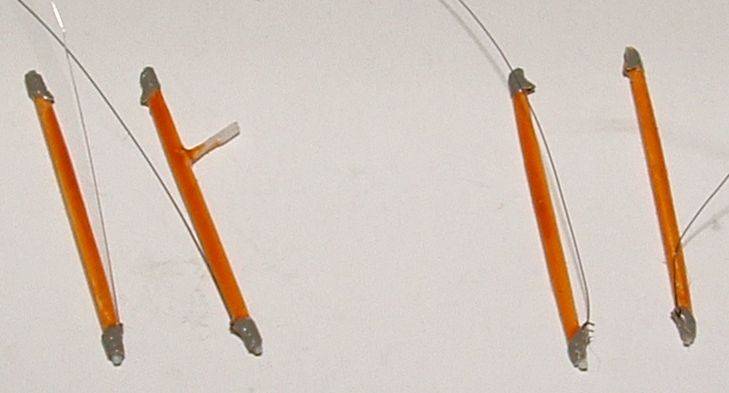
I also paint the interplane struts wood, with a coat of Humbrol 148
and a coat of a mix of Tamiya clear yellow and clear orange (4:1). The
rigging fixations are painted PC10. The rigging, made from Dai-Riki fishing
line, is added to the bottom fixations of the struts. Not very easy to
do, but possible.
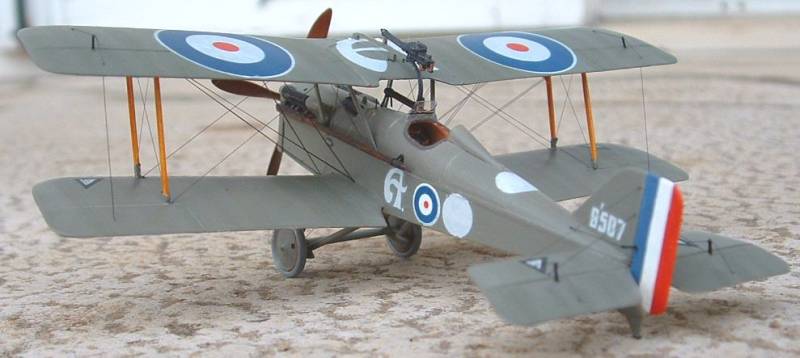
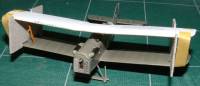
 Now,
I will fit in place the top wing, always a delicate task. First, I prepare
a jig, made of thick cardboard and able to be self-maintained in place.
Then, I put the top wing on it, secured with masking tape. I can now start
to add the interplane struts. When done, I made the cabane struts from
scratch as the kit ones does not have the right length (or I may have
done something wrong somewhere). Now,
I will fit in place the top wing, always a delicate task. First, I prepare
a jig, made of thick cardboard and able to be self-maintained in place.
Then, I put the top wing on it, secured with masking tape. I can now start
to add the interplane struts. When done, I made the cabane struts from
scratch as the kit ones does not have the right length (or I may have
done something wrong somewhere).
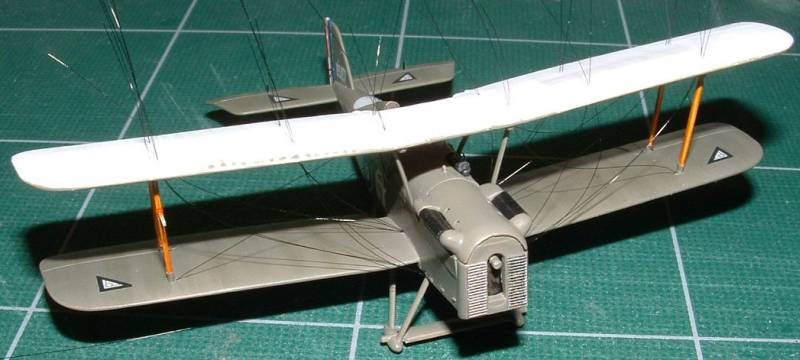
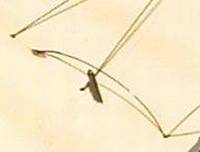
 Now,
the rigging. I start to pass the wire through the upper wing to the corresponding
hole in the lower one, glued with superglue gel. When everything is dry
(I prefer to wait at least 24h), I tight the wires and when they are close
to be tight, I add a little blob of glue on it in order to have the glue
going in the hole. I maintain the wire tightened about 30 seconds, and
it is glued. After an other waiting period (at least 1 hour, I add some
thin CA in each top wing rigging hole. It strengthened the fixation and
filled the hole. Now,
the rigging. I start to pass the wire through the upper wing to the corresponding
hole in the lower one, glued with superglue gel. When everything is dry
(I prefer to wait at least 24h), I tight the wires and when they are close
to be tight, I add a little blob of glue on it in order to have the glue
going in the hole. I maintain the wire tightened about 30 seconds, and
it is glued. After an other waiting period (at least 1 hour, I add some
thin CA in each top wing rigging hole. It strengthened the fixation and
filled the hole.
 When
dry, I cut the wire with a razor blade, a little sanding, and it is done. When
dry, I cut the wire with a razor blade, a little sanding, and it is done.
The wires for the command are attached with almost the same method, with
an additional step, the gluing onto the control horns.
After that, I mask the top wing, apply a coat of PC10, and add the decals
and then a coat of satin varnish. I also add some weathering with pastel
chalk.
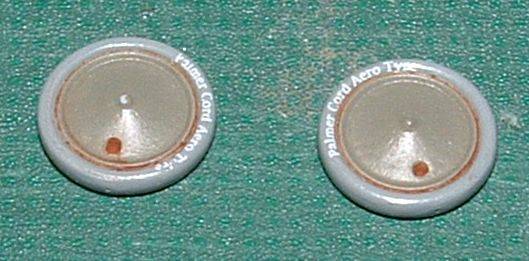
Now, the wheels. They are PC10, with light grey tyres. I add a nice
touch with the "Palmer Cord Aero Tyres" decals provided by Bob
Pearson. After that, I apply a wash of Burnt Sienna.
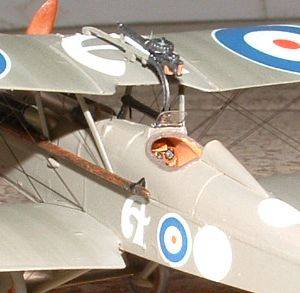
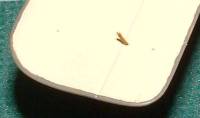
  It
is time now to add the little parts, which finish the plane. First of
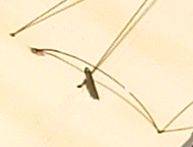
all, the gunsight. I found the fixation not very realistic, so, with the
help of pictures, I replaced them with some brass from the PE fret and
cut at the right length and thickness. I paint it satin black. It
is time now to add the little parts, which finish the plane. First of
all, the gunsight. I found the fixation not very realistic, so, with the
help of pictures, I replaced them with some brass from the PE fret and
cut at the right length and thickness. I paint it satin black.
 I
prepared and painted the PE topside machine gun support, add it in place
and then glue the gunsight, one of its support around the MG support.
Then, I add the machinegun. I also add the exhaust pipes and the windshield. I
prepared and painted the PE topside machine gun support, add it in place
and then glue the gunsight, one of its support around the MG support.
Then, I add the machinegun. I also add the exhaust pipes and the windshield.
Last stage, the propeller. First, I remove the moulded propeller boss,
then I Brush a coat of Humbrol 110, and, when dry, a coat of Citadel Chestnut
ink. After that I paint the PE propeller boss in Citadel Boltgun metal
and glue it in place, and glue the propeller in place.
Conclusion
  This
kit is very nice and fill a lack in the WW1 fighter 1/72 kits. It is not
perfect but there is no big problem and regarding the issue of the decals,
Roden is very reactive and their decals are better now. The only real
minus is the lack of information regarding the rigging. This
kit is very nice and fill a lack in the WW1 fighter 1/72 kits. It is not
perfect but there is no big problem and regarding the issue of the decals,
Roden is very reactive and their decals are better now. The only real
minus is the lack of information regarding the rigging.
The Part PE is very nice, very useful even if I didn't use everything.
I use some of their part as reference to scratchbuild mine.
I would thank Matt Bittner to give to me the possibility to do this
review.
 Thank
you also to Roden and Part to provide the review samples. Thank
you also to Roden and Part to provide the review samples.
My references
:
|
|