
ACCURATE YAK Accurate Miniatures' 1/48 Yak-1b Out of the Box
By Tom Cleaver
 |
|
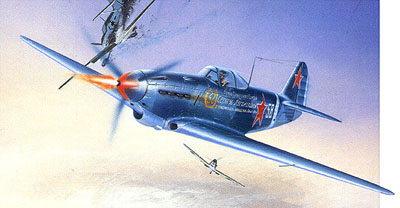
The Yak Series: Of the many types of warplanes used by the Soviet Air Forces during the Second World War, the most celebrated and successful were undoubtedly the fighters by the design bureau led by Alexander Sergei Yakovlev. Though they lacked the refinements found in British, German or American fighters, they nevertheless commanded the respect of their enemies. Simple to build in quantity, rugged, and possessing Until recently, the Soviet Union was as Winston Churchill once described it, "a riddle wrapped in an enigma surrounded by a mystery." With the end of the Cold War and the opening of Russia to the rest of the world, this is coming to an end. A year ago Accurate Miniatures (A-M) introduced their kits of the Il-2 series; now we have the Yak-1 and Yak-1b, produced to their same quality standards. The Yak-1b: The Yak-1b was for many years known in the West as the Yak-1M. It is now known that the Yak-1M designation was given to only two airplanes, the protoypes of what became the Yak-3 series.
The Kit: Opening the box reveals a standard A-M kit: clean, crisp moldings in medium-grey plastic with no flash. The clear parts and decals are in separate bags. The instruction sheet is detailed and definitive. If one actually follows Accurate's suggestion and reads the instructions, assembly is easy. Construction:
Next, the fuselage is assembled. Bill Bosworth of A-M has told me that, if he had it to do over again, the oil cooler and radiator would be separate parts. That's not going to Once the fuselage is assembled, you slip the cockpit assembly into position; you'll know it's where it should be when you hear a "click." A bit of glue to keep everything in position and it's on with the wings. I have now built two of these models, and both of them had warped lower wing parts. It wasn't bad, and gluing the upper wing sections on solved the problem, but I found myself using rubber bands to be sure everything stayed in position for about 20 minutes until it set up. I used a bit of putty along the join line of the upper wing and fuselage, and on the join line of the lower wing to the nose. A bit of putty was necessary on the oil cooler and radiator, but past that everything was fine. Painting:
In the early 90s, 25 Yak-3U aircraft were produced in Russia for warbird collectors and sold here in the United States under the auspices of the Santa Monica Museum of Flying. It was said then that the aircraft had been painted with accurate colors, from original Russian stocks. Since a friend of mine happens to own one of these hangar queens, which he keeps over at Van Nuys airport, I went over and looked at the airplane closely. A-M's call of Extra Dark Sea Grey and Ocean Grey is very close, but to me there is a greenish tinge to the colors on this Yak-3U. What I ended up using was Tamiya Extra Dark Sea Grey (VF-54) with a touch of Tamiya Field Grey (XF-65) for the darker grey, and Gunze Sanyo H-337 Blue-Grey with a touch of Gunze Sanyo H-70 RLM Grey for the lighter grey, with a mixture of Tamiya Neutral Grey (XF-55) and Flat Blue (XF-8) to get the rather intense light blue used on the undersides. I then freehanded the pattern without making any spray masks, since there was supposed to be fairly-ample overspray to the result. Decals:
Final Assembly: I chose not to use the drop tanks or underwing rockets supplied in the kit. The landing gear assembles easily. The canopy is a bit thick, but the plastic is very clear. I chose to finish mine in the open position to maximize viewing ease of the beautiful cockpit. Since the airplane was all wood and fabric and therefore not subject to paint chipping, I weathered it with exhaust stains and some mud spray on the lower wing, as well as a coat of mud on the wheels. These airplanes were covered with a thick polish at the factory that stood up amazingly well to field usage, so when I gave the model a final coat of flat, I made sure it ended as a semi-gloss finish. Recommendation:
|
 superlative flying characteristics, they were superior low to medium altitude fighters. The series was built in larger numbers than all other Soviet fighters used during the war combined, with a total production in excess of 30,000 between 1941 and 1945. Inadequately powered by the M-105 series of engines (which left much to be desired in terms of altitude performance), the Yaks were also lightly armed by either German or Allied standards.
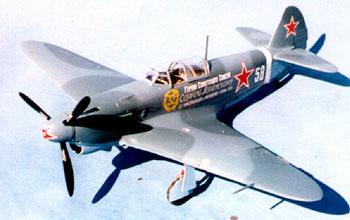 As production of the Yak-1 series progressed, a number of modifications were introduced, one of the most important being the installation of the M-105PF engine, which provided 1,210 h.p. for takeoff. The twin Beresin UBS 7.62mm machine guns of the Yak-1 were replaced by a single Beresin UBS 13mm machine gun, with the 20mm hub cannon retained. This aircraft was introduced to combat in 1943, being produced alongside and serving alongside the earlier version.
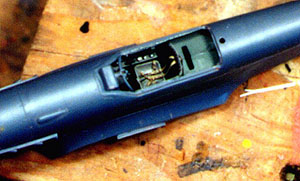 Once all the parts are pre-painted according to instruction, assembly starts with the cockpit. With a minimum of fuss and bother, a very accurate-looking cockpit is created from a minimum of parts. Do be careful in cutting out the side structures: there are a number of flow gates that need to be removed, and it would be easy to cut the structure instead. To me, the only thing I could think of to add to this was a set of Eduard etch-brass seat belts. However, using the kit-supplied decals on masking tape would also create a very acceptable looking cockpit.
 happen, and there is a bit of fiddling here to get the exhaust gates into the position you want them - open or closed (open is easier) - but everything lines up and the fuselage goes together easily. Pete Chalmers, who has build several of these models for A-M as part of their development process warned me that the upper decking is a hair too wide in being fitted to the lower fuselage. I solved this by putting a shim of 10mm sheet styrene into the centerline join of the lower fuselage, and everything lined up perfectly.
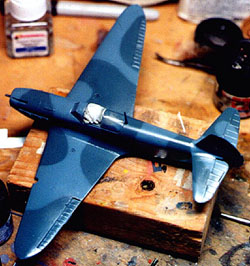 There is as much controversy now about the colors used by VVS aircraft during the war as there was about Luftwaffe colors 20 years ago. Some of the argument is, to me, very dogmatic considering the lack of data, and I agree with A-M that more information will come. A modeler can follow A-M's paint suggestions with confidence that no one can prove them wrong, and a good-looking model will result. I decided to do a bit of research on my own, since the sources were nearby.
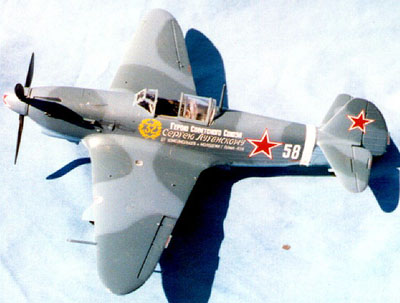
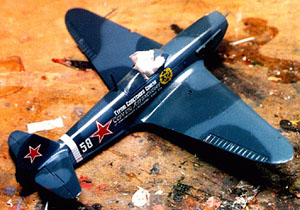 The kit decals, for an airplane presented to "The Hero of the Soviet Union Sergey Luganski from the Komsomol Members and Youth of Alma-Ata City," go on easily. I used setting solution after getting them into position using only water. A-M kindly provides two of the star decals to be used on the spinner, and I ended up using both to get it finally right. The result looks very good.
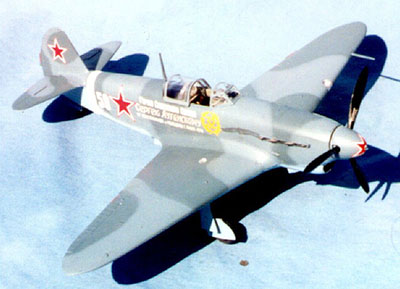 What can I say? It's another accurate miniature from Accurate Miniatures. In my experience, this was one of the easiest models to build I have run across ever. It's not shake-and-bake Tamiya, it requires a bit of fiddling here and there, but the whole thing took me about 12 hours to complete, and I really wasn't pushing things that hard, even though I was right up against the publication deadline for this review when I started the model. Any average modeler is going to find they have created one of the best-looking models in their collection when they finish one of these beauties. Get 'em all!!